
The earlier guides in this series taught you how to read a spec sheet — CPU, RAM, storage, graphics, power, motherboard, and Mac configurations.
This last guide answers a more practical question: what do you already own?
Before you upgrade, buy a new machine, or ask someone for help, you need a clear snapshot of your current CPU, memory, storage, and graphics. Windows and Mac show this information in different places, but you do not need extra software. Built-in screens are enough.
1. First: Confirm Whether You Are on Windows or Mac
You only need to follow one of the two sections below.
- Windows: The taskbar is usually at the bottom. The Start button looks like a four-pane window.
- Mac: The menu bar is at the top of the screen. The top-left corner has the Apple logo ().
If you are not sure, look at the top-left corner. An Apple logo means Mac. No Apple logo usually means Windows.
2. Windows: Three Built-In Screens
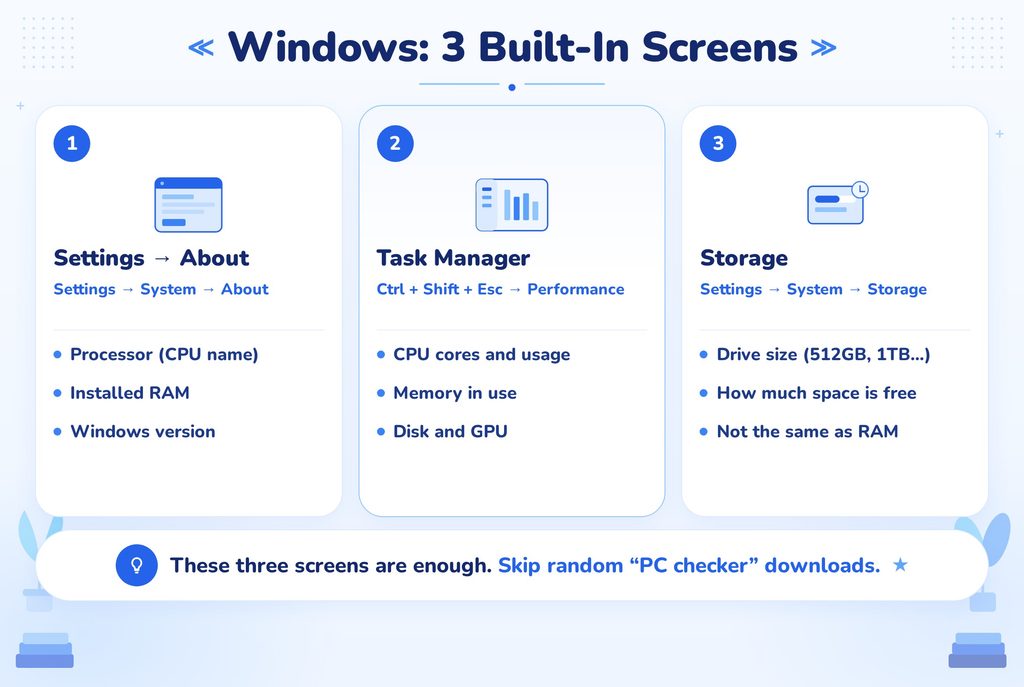
You only need three places. You do not need to download “PC checker” apps from the web.
① Settings → System → About
This is the fastest overview.
- Open Settings (Win + I).
- Go to System → About.
You will see:
- Processor — your CPU name and generation
- Installed RAM — total memory
- Device name and Windows version
This screen is enough for a first snapshot. It does not always show the graphics card clearly.
② Task Manager → Performance
This is the most useful screen for beginners.
- Press Ctrl + Shift + Esc.
- Open the Performance tab.
Check these items one by one:
- CPU — name, core count, current usage
- Memory — total RAM and how much is in use
- Disk — SSD or HDD, capacity, current activity
- GPU — dedicated graphics card if you have one; otherwise the CPU’s integrated graphics
If you see two GPU entries, the stronger one is usually the dedicated graphics card used for games and video work.
③ Settings → System → Storage
This shows how full your drive is.
- Open Settings → System → Storage.
- Note the total size (256GB, 512GB, 1TB, etc.) and how much is free.
Note:
RAM and storage are easy to mix up. RAM is short-term working memory. Storage is where Windows, apps, and files live. “8GB” on the About screen is RAM. “512GB” on the Storage screen is the drive.
3. Mac: Two Built-In Screens
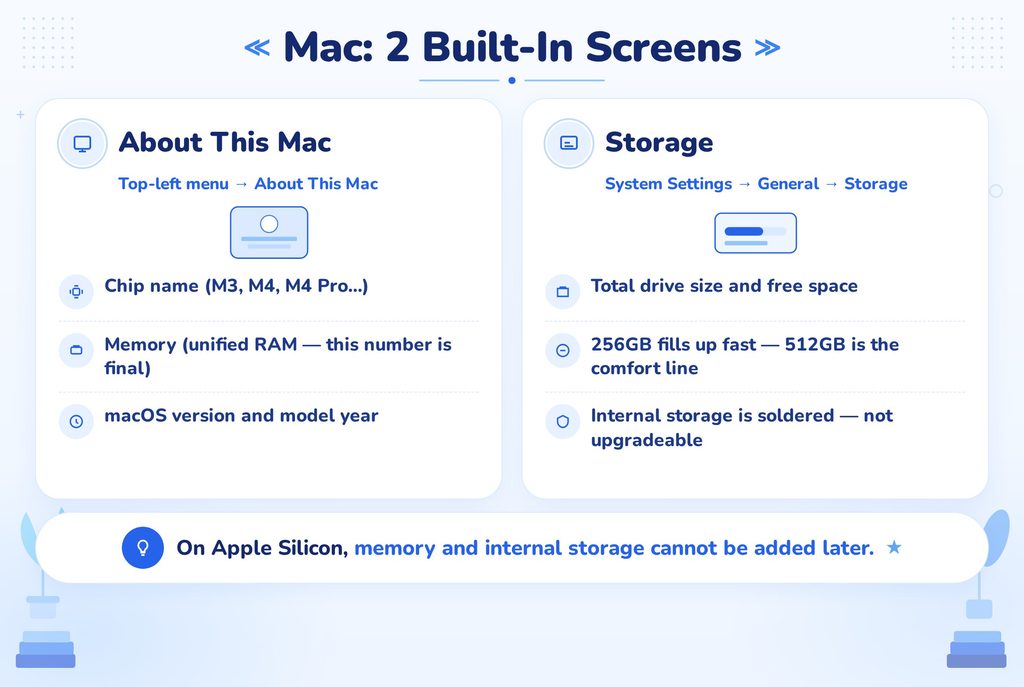
On a Mac, start with About This Mac. You still do not need extra apps.
① Apple menu → About This Mac
- Click the Apple logo () in the top-left corner.
- Choose About This Mac.
You will see:
- Chip — M-series name (for example, M3, M4, M4 Pro)
- Memory — unified memory (this is the Mac’s RAM)
- macOS version
- Display size on laptops and iMacs
Click More Info… if you want the longer System Settings page.
② System Settings → General → About / Storage
- Open System Settings.
- Go to General → About for chip, memory, and model name.
- Go to General → Storage for drive capacity and free space.
On Apple Silicon Macs, the CPU and GPU live on the same chip. You will not see a separate “graphics card” the way Windows gaming PCs do. The chip name (Base / Pro / Max) is the graphics tier.
Note:
You cannot add RAM later on a modern Mac. If About This Mac shows 8GB or 16GB, that number is final. That is why Guide #7 treated the first purchase as a long-term decision.
4. What to Write Down (The Same Four Items on Both OS)
Once the screens are open, copy these four lines. This is the information that matches the rest of this series.
| What to record | Windows where to look | Mac where to look |
|---|---|---|
| CPU / chip | Settings → About, or Task Manager → CPU | About This Mac → Chip |
| RAM / memory | Settings → About, or Task Manager → Memory | About This Mac → Memory |
| Storage | Settings → Storage | System Settings → General → Storage |
| Graphics | Task Manager → GPU | Chip name (M / M-Pro / M-Max) |
If you are asking a friend, a shop, or a forum for advice, paste these four lines. “I have an i7” or “It’s a MacBook” is not enough.
5. Common Mistakes Beginners Make
- Mixing up RAM and storage. 16GB is memory. 512GB is the drive. They are not interchangeable.
- Reading only the CPU name. An older “i7” can be slower than a newer “i5”. Check the generation, not just the tier. (See Guide #1.)
- Ignoring the GPU on Windows. Office laptops often have only integrated graphics. That is fine for documents, not for heavier games.
- Assuming a Mac can be upgraded later. Memory and internal storage are fixed on Apple Silicon Macs.
- Downloading random “spec checker” tools. Windows and Mac already show this information. Unknown download sites are a common malware trap.
6. A Simple Order to Follow
- Confirm Windows or Mac.
- Open the About screen.
- Check storage separately.
- On Windows, open Task Manager to confirm the GPU.
- Write down CPU, memory, storage, and graphics.
- Compare those four items with your actual work — documents, gaming, editing — using the earlier guides.
You do not need to understand every line in System Information. The four items above are enough to decide whether to keep, upgrade, or replace the machine.
Final Takeaways
Checking your specs is not a technical exam. It is a short inventory.
- On Windows, use Settings → About, Task Manager → Performance, and Storage.
- On Mac, use About This Mac and System Settings → Storage.
- Record four things: CPU/chip, memory, storage, graphics.
- Do not confuse RAM with drive space.
- Do not install extra checker apps unless you already know the source.
Once you can read a spec sheet and read your own machine, you can ignore most sales noise and decide based on the work you actually do.
Next Article: Read the next part of the series: [Beginner’s Guide #9] Custom PC Builds by Use Case: Minimum vs Optimal Specs
Previous Article: [Beginner’s Guide #7]How to Choose the Right Mac Specs: Why Your First Decision Is Final

[…] earlier guides [Beginner’s Guide #8] How to Check Your Current Computer Specs: Windows and Mac taught you how to read each part on its own — CPU, RAM, storage, graphics, power, and […]
[…] Next Article: Read the next part of the series:[Beginner’s Guide #8] How to Check Your Current Computer Specs: Windows and Mac […]